Sunday, June 30, 2013

Getting Ready for the 4th of July

Who else is prepping to celebrate Independence Day? We sure are! We have a bunch of Red, White and Blue themed activities and craft projects planned for this week, many that we will be sharing on here!

I know it's not July yet, but it is the start of the week. So I have decided to kick-start our week-long Red, White and Blue theme by doing a simple science experiment. Which, of course, like most things here, started out as something specific that turned into something else. That being said, if this had gone the way I had planned, we would have been using eyedroppers for the vinegar instead of "the squirters". But the kids insisted, after having so much fun with them for our liquid sidewalk chalk the other day.

I poured a cup of baking soda into a Ziplock container and added enough water to moisten it. Then I froze it for about an hour. Freezing the baking soda makes it last longer, or at least it would have. :)


I filled the icing bottles mostly with vinegar and topped it off with a small amount of water. I added blue and red food colouring and shook them up. The kids were so excited when I brought them out and immediately popped off the tops.


Bean recognized the frozen baking soda from our arctic small world and was excited to play with it again.


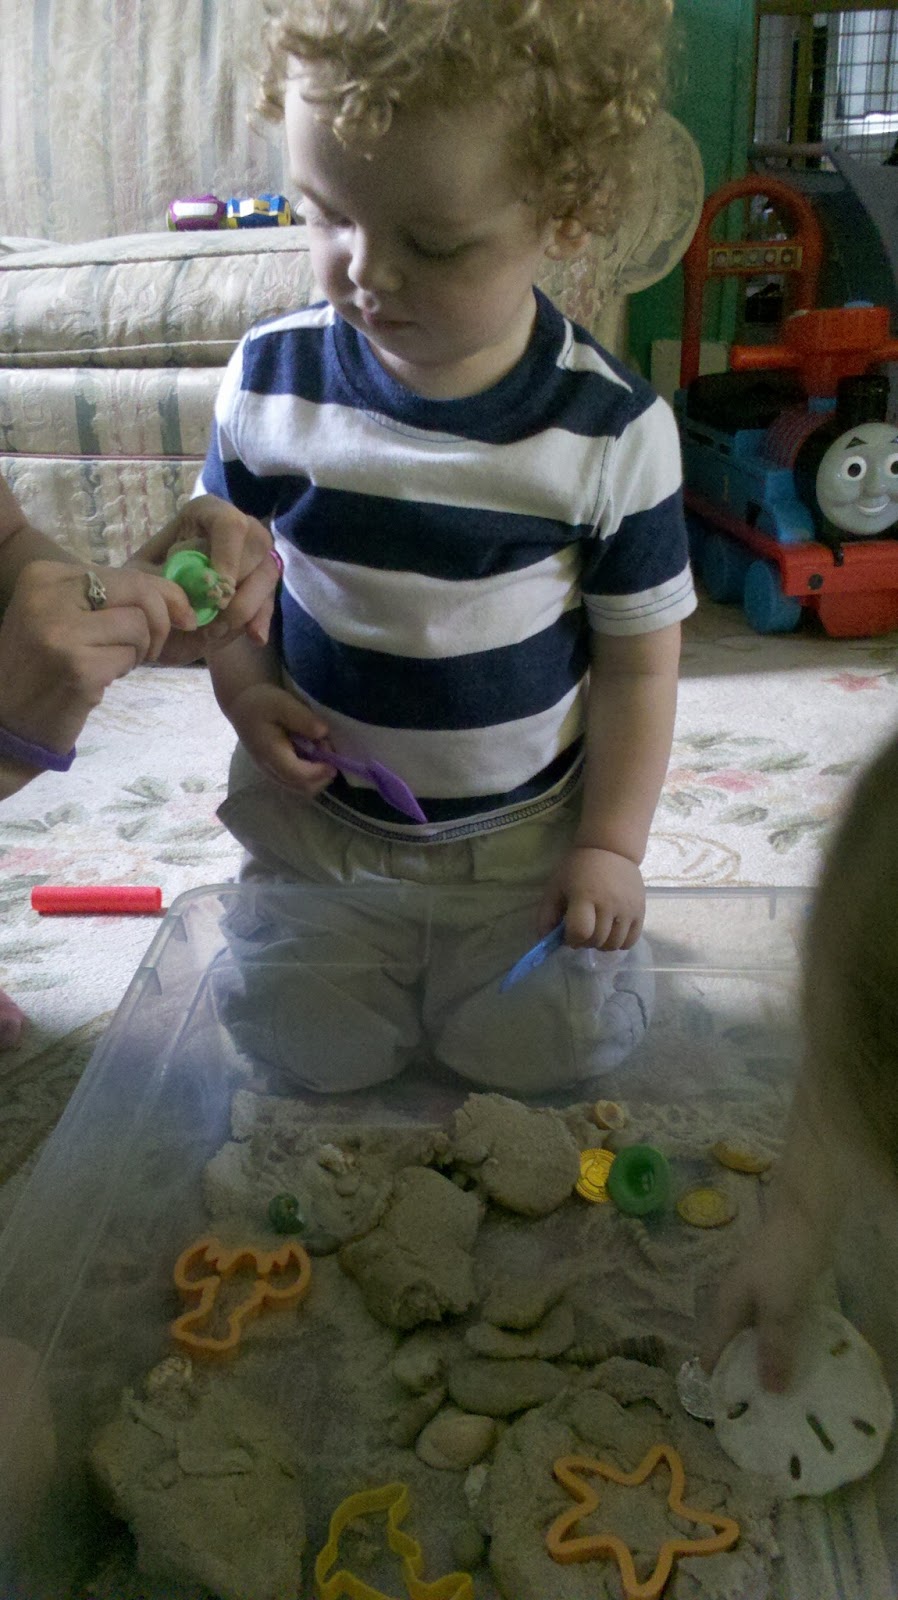
Now that Munchkin is a pro squirter, he was ready to go! But, he thought this was going to be like the liquid chalk... he was in for a surprise. :)


Bean just LOVES the eruptions! We love making volcanoes and sometimes we just play with baking soda and vinegar at the table waiting for dinner to finish cooking.


But this is the first time we have used multiple colours!


A simple experiment like this is perfect for introducing them to the science of colours. As they squirted out the vinegar, they were able to watch the colours mix together and produce a dark purple.


They needed to make sure all the vinegar was used and then they used their hands to start mixing the colours together.


Munchkin especially likes this part because he loves when the eruptions fizz against his hands.


Good to the last drop. :)


It looks almost black now, and they loved playing in it until all the baking soda was used up too, since it was sitting at the bottom and whenever they found a clump it would fizzle in their palms.


Starting tomorrow we will have 5 days of Red, White and Blue themed crafts, activities and sensory bins.

{If you enjoyed this post, please consider following me on Facebook and Pinterest. Thank you!}

Construction Paper Roads

When I saw these printable roads from Picklebums, I just knew I had to make something similar for Munchkin. He absolutely adores his toy cars and spends so much time playing with them. And although he has a small racetrack that he loves, he sometimes gets bored with it (he really only uses it because it has a ramp and he can crash all the cars together). Now he will have a set of roads that we can pull out whenever he wants. It'd be great to laminate these so they don't get ruined, but we'll see how long they last... Luckily they are easy to make and can be replaced basically for free (provided we don't run out of black construction paper).

All you need are a few sheets of black construction paper (or brown for dirt roads! we will be making some of those soon too), white crayons or chalk, and scissors. I didn't bother measuring anything, I just folded the paper wide enough for his cars to fit on. 


I cut short, medium and long straight roads and a few corner roads.


Then I drew some divider lines on both sides of the roads. The roads are not wide enough for two cars to pass each other, only one fits at a time. I did this purposely, because I only needed these to look like roads. Munchkin has this thing about lining cars up... I wasn't worried about his cars needing to pass each other, they drive in an orderly fashion. 


Once the roads were cut up, I let Munchkin and Bean help draw the lines (rather, add some road art).


Bean watched and waited while we drew on the divider lines.


As soon as the roads were all finished, I didn't even have to give any suggestions on how to set up the roads. Bean started lining the roads up around the border of the table. She searched through the pile until she found corner pieces and then connected them with straight roads. She liked that there were a couple different sizes and she had to look around for the right size that fits. She said it was a puzzle.


Munchkin watched her and then followed her lead.


He was so happy when he had connected a road that he had to sit back and admire his work.


Bean pretty much felt like a pro. Look how casual she is, haha.


Munchkin started lining up his cars on the road. Bean said they were parked so we could make more roads.


A few minutes later the roads were all built! Bean really enjoyed fitting the roads together and she drove the cars around for a bit. Munchkin didn't know how he felt about that...


So he started to line them up...


The construction trucks were brought over to play too.


And soon all the cars and trucks were lined up in two orderly lines. Bean did manage to drive a few cars around, despite the line up. I told her that this is what a road block looks like and it was ok for her to find a way around it. :)


They had to rearrange the roads several times before they found a set-up that they liked best. I am so glad that they really enjoyed playing with these roads and it will most likely become a favourite quite-time play activity from now on.


{If you enjoyed this post, please consider following me on Facebook and Pinterest. Thank you!}

Saturday, June 29, 2013

Liquid Sidewalk Chalk

Liquid sidewalk chalk is super easy to make and you can use it in multiple ways. Normally when I whip up this batch, I divide it into a muffin pan and mix in some colours. Then we bring it outside and paint the sidewalk and outdoor furniture. But this time we wanted to try something new and decided to use icing bottles for squirting the liquid chalk instead. 

The Recipe
1/2 cup cornstarch
1/2 cup water
liquid watercolours or food colouring


I scooped the cornstarch into the bottles, then poured the water over it.


I put the covers back on and shook it up until it was thoroughly mixed. Then I removed the covers, added the colours, then replaced the covers and shook it again.


Then they are ready to use! (My recipe is only a suggestion, feel free to use more or less of the ingredients to fit the consistency you desire. I filled the remainder of the bottles with extra water because I wanted these ones to be slightly watery, so they would be able to easily squirt it out.) I chose red and blue food colouring, but the red resulted in pink.


Honestly, this was just to test out how much they enjoyed playing with liquid sidewalk chalk squirters over the usual muffin tin chalk paints. These did not last long. They had so much fun squirting them out that they were gone in minutes. And it had just finished raining, so the still wet pavement made the liquid chalk spread out quickly.


They squirted here. They squirted there. They squirted everywhere!


They really enjoyed running over to each other to squirt the others puddle of chalk so that the colours would swirl together (they stayed clearly pink and blue and didn't mix, as you can see below).


It's was so much fun watching him try to figure out how to squirt it. :)


Needless to say, this was super fun! I can't wait to try this again using a thicker mixture now that I know they enjoy playing with it. :)

{If you enjoyed this post, please consider following me on Facebook and Pinterest. Thank you!}

Summer Sensory Play: Sand Dough

I searched around on the internet for a while to find a recipe for sand play dough and finally settled on this one from Blog Me Mom. I experimented with a few of the other ones, but ultimately this one won because it was really simple to make (no cooking required!) and had the consistency we liked. Although we did double the recipe because it was going to be shared between three kids.

The recipe
2 cups of play sand
2 cups of flour
2 tablespoons of cream of tartar
2 tablespoons of vegetable oil 
3/4 - 1 1/4 hot/boiling water 

Add together the play sand, flour, cream of tartar and oil. Mix thoroughly and then add the water slowly in small increments. Knead dough until it has a consistency similar to play dough. Then it is ready to use! 


Looks just like play dough, just with sandy goodness!


I divided the dough into three balls and put them in a large bin that we use for our sensory play activities. I added play dough toys, pirate treasure, shells, rocks, and some additional sand (it's used to fill up the shells). 


This is a fun fine motor activity! And with so many options to choose from, each of them were able to play with their ball of sand dough the way they wanted. Bean used hers to stamp with the dolphin and starfish dough cutters.


The shells were used to make impressions in the sand dough.


Munchkin spent a bit of time practicing his karate chef skills. He used the knife and shovel to divide up his share into dozens of smaller pieces. 


But was ultimately won over by watching L's mother press sand dough into little strands.


At one point Bean rolled some sand dough into a ball and asked me to hold it. She stuffed a tower screw shell into it and I asked her if she was making a little creature. L added the eyes and the shell fins. It's a narwhal. :)


Bean flattened out her sand dough ball and used the pirate treasure to make impressions. Then she used the tower screw shell to poke holes into it. 


Step-brother L used the roller to add many circles to his flattened out ball of sand dough.


Then he used the tower screw shell to poke holes in the circles. They looked like little faces. :)


This was a nice quiet-time activity that kept the kids busy for about an hour. 

{If you enjoyed this post, please consider following me on Facebook and Pinterest. Thank you!}
Related Posts Plugin for WordPress, Blogger...